

If you’re interested in computers and are finally looking into building your very own after years of buying pre-builds or having friends help you, you might be nervous about what comes next. It can be difficult to know how to build a computer from scratch without prior knowledge, but that doesn’t mean it’s impossible – all it takes is a little bit of understanding about the basics to help you develop a better understanding of how the system works on the whole. In this article, we take a look at some of these basics to help guide you in the right direction when it comes to your first PC build.
Finding the right parts for your PC
The first step you’ll need to consider in a new PC build relates to all the components you’ll need. What you choose will depend entirely on your needs, as not everyone will necessarily need a 750 watt computer power supply to power a large graphics card. Instead, work out what kind of processing power you need so that you don’t have to spend large amounts on components you won’t make the most of. Generally, the main uses of PCs can be for gaming, content creation (such as music production or video editing) or general business use. Gaming will require a big investment in the graphics cards department, content creation will typically require a beefy CPU but with general use PCs you can get a little bit of everything that your budget allows. In terms of actual components for a complete PC build, you’ll need a CPU (and cooler if your CPU doesn’t come with a stock cooler), motherboard, RAM, power supply, graphics card and a hard drive. If you’re looking to build a beefy rig you might even want to consider liquid cooling to ensure temperatures are easily managed. Do make sure that you find a case that actually fits all these bits, though!
Assembling your parts
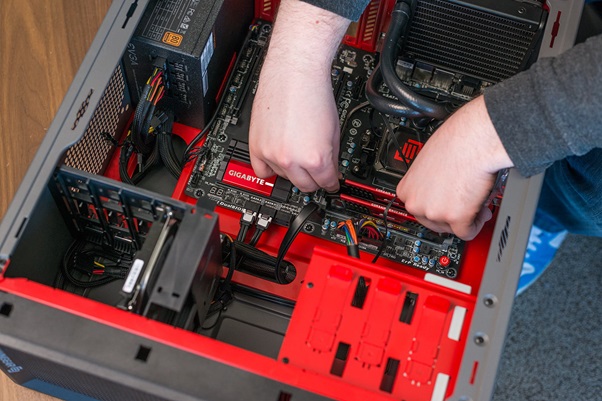
Assembling all of the PC components is where a lot of people get tripped up. Assembly doesn’t necessarily require a very specific order, but it can be useful to take the following steps in any case – first, slot your CPU into the CPU base of the motherboard. Then you can slot your RAM sticks into their relevant slots. To do this, find the notch in the RAM and align it with a bump in the RAM slots and lift the latches you see. The insert the RAM – the latches should lower and click if they are inserted correctly. Then you should install the CPU cooler over your CPU, but it’s good to keep in mind that this often differs between coolers to some extent. You’ll usually want to install your power supply next – this will occupy a specific location in the case and may require you to move a PSU bracket on the case.
The final steps
With all the other bits set up, its time to install the graphics card. This isn’t too difficult as you’ll just need to connect all of the cables from the power supply to the motherboard, and don’t forget to power on your front USB ports! You’ll now want to install your storage option, which will most typically be a SSD – your case will usually indicate where it should live.